
Back to Frequently asked questions
Courtesy of Peter Claassen
In creating the ultimate driving experience, those clever BMW
engineers decided on a shift system with lots of rubber isolation
and relatively long throws. The ultimate shifting works great
when the car rolls off the dealers lot, but as the odometer
climbs in the 100's of thousands of miles, the rubber gets soft
and the shifts become looser and vaguer. Maybe you are desiring a
quicker shift pattern for the stoplight Grand Prix. A quick shift
replacement is as simple as changing the fulcrum point on the
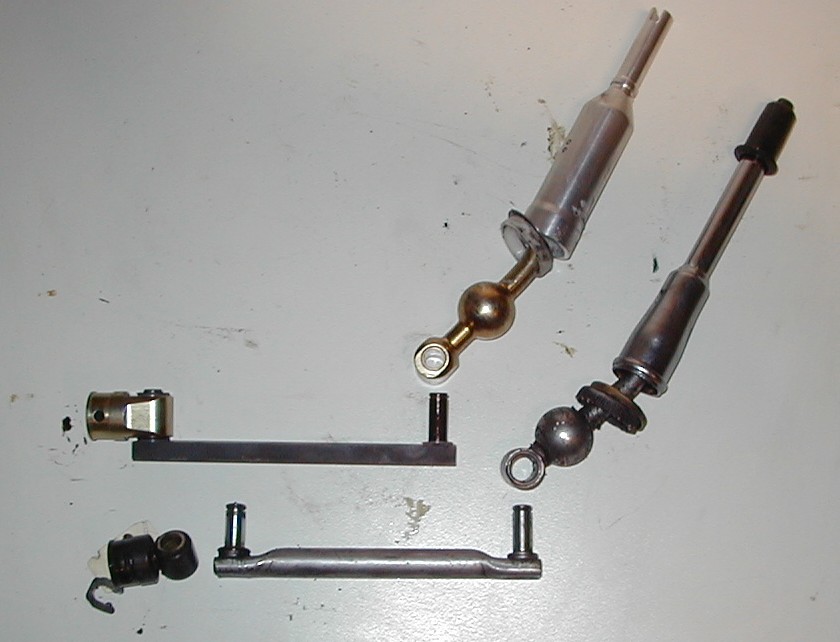
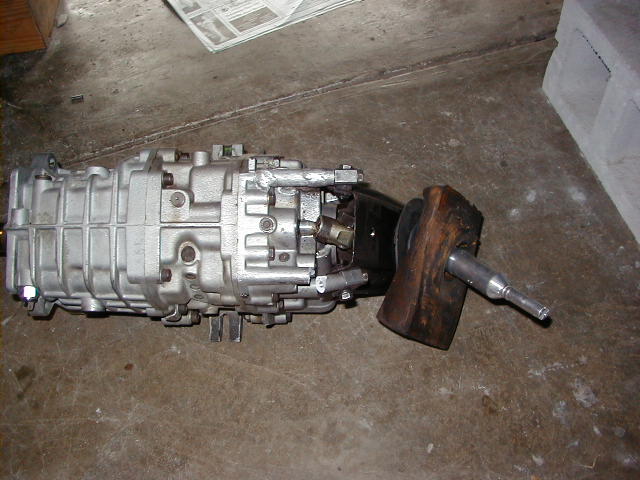
shift lever. See the Photo 1 comparing a stock shifter (bottom of
photo) with an after market shifter. As you can see the distance
from the bottom of the ball to the bottom link is further than
stock. This decreases the distance the knob has to travel to move
from 1st to 2nd gear for instance. You get a tighter shift
pattern, shorter throws, especially way out in right field to 5th
gear, and less interference with your power adapter in the
cigarette lighter. IMHO opinion there is a trade off, after all
those Munich Engineers are not dumb!, the factory shift takes
less effort and tends to be less "notchie". The short
shifters take a little more "oomph" and seem to be more
"notchie" especially on higher mileage transmissions.
Mine is especially vague for shifting into 1st or reverse from
neutral. But what the heck!, short shifters are a nice addition
to an E 12.
You have several options in short shifters. The first and least
expensive is to use a shifter from any 2002, the bottom throw
distance is similar to the after market units. (see Photo 2, 2002
shifter is on the left) Prices range from free to $40 bucks.
There are several fitment issues related to the 5 speeds (vs 4
speeds) that we will cover. The second is to get a M3 shifter new
from BMW, approx. $75. The third is to go to UUC, Metric
Mechanic, or Auto Solutions (An Auto Solutions shifter is shown
in photos 1). You need to check current prices but they tend to
range around $200. For that you get a complete linkage, bushings,
and clips. Look at Photo 1 and Photo ? to see the Auto Solutions
unit. It is way more stout, robust, and manly than the factory
unit making it ideal for racing and extreme use. Auto Solutions
is extremely helpful over the phone with technical support.
While you are changing your shifter it is a great opportunity to
replace that worn out soft and cracked rubber. The rubber
affecting shifting occurs in 3 different locations. First, there
are 2 aluminum and rubber isolators that fasten to the rear end
of the tranny. Approx. $15 each. Second there is a rubber keeper
at the tail end of the (5 speed only) sheet metal shift deck. You
can replace it with OEM from a dealer. We advocate superseding
this rubber with a more positive attachment (See photo 2, the
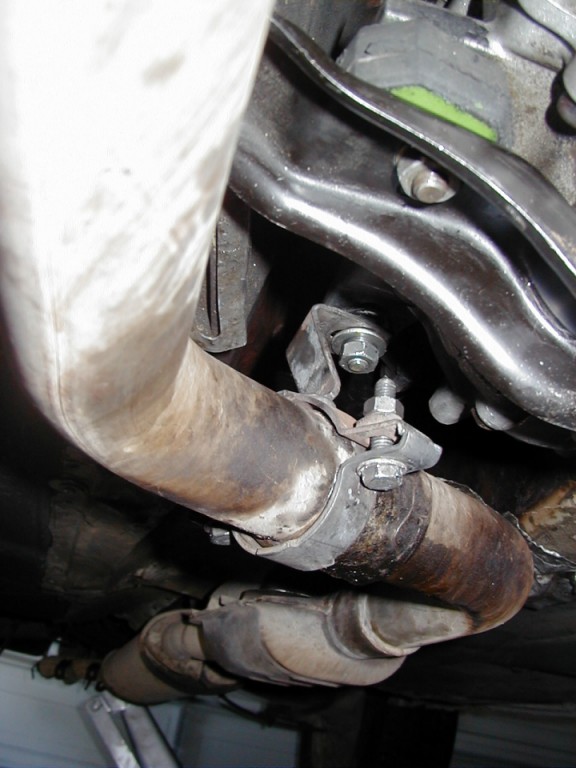
black rubber isolator with nuts on each end). Third, replace the
transmission rubber mount near the exhaust hanger. Approx. $15.
Better yet, get a tranny crossbar from an E28 and install 2 new
tranny mounts. (The Gertrage 265 has provision for a second
mount)
The good news is that you can change the shifter with out
removing the transmission. It will require working under the car.
Some operations will have to be done by Braille since the rubber
guibo is in the way of seeing the shift linkage attachments.
Disassembly:
Leave the tranny in 4th gear or neutral. Once apart you will not
be able to shift the car.
In the car. Remove shift knob. (81 and earlier have threaded
knobs). Remove the side trim screws holding the leatherette flat
panel which holds the shift boot. Slip off of shift rod. Remove
black rubber booty from shift rod. The shifter resides in a
circular assembly integral to the black metal deck. At the inner
periphery is a "c" clip with 2 little holes at the
ends. This clip needs to be compressed enough to pop out of the
black circle. Use your handy BMW circlip tool, or 2 drywall
screws in the 2 holes to squeeze ring, or 2 small screwdrivers
approx. 3/8" away from little holes to lever the circlip.
(There are indentations at those places allowing a screwdriver to
slip into place.)
Underneath the car. Remove the circlip holding the transfer link
to the shift rod bottom connector. Keep track of the washers and
spacers that come off. You will have to wiggle the shifter apart
from the transfer rod pin. Voila ! The shifter will pop out from
the top.
Assembly is the opposite.
Removing Shift Linkage
This is where the braille part begins. The transfer linkage
connects with a pin and female connector to a "cup"
fastener that is pinned to a ½" diameter rod at the rear of
the transmission. The rod is cross drilled for the pin. A 1"
diameter x 3/16" wide x very thin spring steel "C"
keeper slides over the cup connector to keep the pin from falling
out. This entire assembly is directly above and in front of the
guibo. (Rubber donut) Your mission is to slide the spring clip
towards the rear of the car so that you can push out the pin.
Stout fingernails or a small screwdriver are helpful in this
endeavor. Study the photos. There are shoulders that keep the
spring steel keeper in the correct position. You have to slide it
over those shoulders. Optionally, you can slide it forward as
well. The reason for 4th gear is that it makes it easier to
access the pin. Once the pin falls on the floor, the linkage will
pull out. Note the orientation of the pin hole at the rear of the
tranny rod.
Rebuilding the shift linkage:
The shift and the connector cup come with factory nylon bushings
which are probably worn out and ovoid in shape. You have 4
options for replacement: 1) Get new BMW nylon bushings from your
friendly dealer. 2) Buy new bronze bushings from BMP. Aprrox.
$35. (There is a catch 22, see below) Shown in Photos. 3) If you
bought a replacement short shift, it should come all set with new
everything. 4) El cheapo. I found 3/8" x 1" bronze
bushings at the local hardware store for $2.50 each. (Buy extras)
The need to be reamed out to the 10.5 mm diameter of the pins and
cut to the correct length. E Mail me for reaming instructions.
The bronze bushings do not fit as tightly into the housings as
the nylon units do which might cause some wear on the housings in
the course of 200,000 miles or so.
Butter the pins w/ 90 lb grease. Put the cup connector and
transfer rod back together using spacer washers and a new
"C" clip on the pin. The rear pin goes together when
re-installing the shift lever. Pre-fit the spring clip on the cup
shoulders leaving the pin hole open. Put back on the rear of the
tranny rod. By braille, re-insert the metal pin. (Put grease on
it to make it sticky) Slide the spring clip into its correct
position and go get a beer.
4 Speeds, 5 Speeds and Catch 22's…………….
Somewhere I read that the 4 speed linkage pieces are similar if
not identical to the 2002. Most critical is that the transfer
linkage pins are 10 mm diameter. Secondly the transfer linkage is
longer. Thirdly, the black metal deck has no rear stabilization /
connector. The 5 speeds have a 10.5 mm pins on the transfer
linkage. Thus the 2002 shifter bushings will not work with the 5
speed linkage. However the bushing outside diameters appear to be
the same. Catch 22, BMP carries 10mm bronze bushings and may not
have the 10.5mm bushings. Unless you have an amazing metalworking
machine shop, the bronze bushings cannot be reamed out 0.5mm.
Hence, the el cheapo bronze bushing solution. In any case, you
need to have your bushings lined up in a row before you start
depending on a 4 speed or 5 speed application.
Dave Spencer adds:
"The original bushing is 13mm OD x 10.5mm ID x 17mm (plus
the flange). Four 1/2" OD x 3/8" ID x 1/2" bronze
bushings can be modified to work. Simply ream the inside to
10.5mm ID and cut the length to 8.5mm to the inside of the top
hat flange. I have noticed the flange varies in thickness
depending on where you get the bushings. If a 10.5mm drill bit
cannot be found, a "Z" index bit is very close (10.4mm
- I used one and used a dowel rod and some 220 sandpaper to get
the other 0.1mm). You can get a machine shop to do this for much
less than the $35 some mail order places charge for the set if
you don't have the correct drill bit".
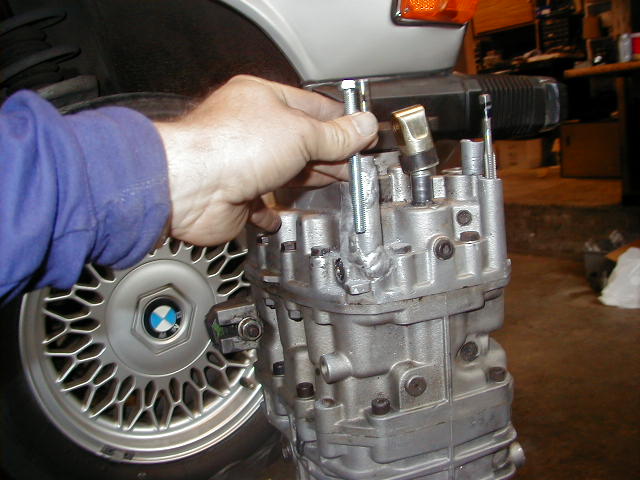
Replacing Rubber Stuff
This step requires pulling the metal shift deck apart to replace
the rubber but should make for crisper shifting. The shifter deck
is stamped steel piece cantilevered off the rear of the tranny.
It is secured to the top of the tranny with 2 bolts via the
aluminum and rubber pieces.(isolators) …… (For 5 speeds
only), the rear of the deck is stabilized with a large rubber
nipple. To remove the deck, undo the 2 horizontal bolts from the
aluminum isolators. The black shift deck should slide down and
out away from the rear rubber nipple. If not there is a rusty nut
at the top of the hump that you have to un bolt. If you are
replacing the aluminum isolators, undo the 13mm bolts securing
them to the top of the tranny. Install new and rebolt. Do not
over torque, the castings are delicate. In fact these castings
are a crummy design on an otherwise great transmission.
Inspect the black sheet metal piece. Check the weld at the rear
"add on" tab. (5 speeds only). The short shift will add
more stress to all of the assemblies. (I know, my welds broke).
If you are a four speeder, you may adaptively install the
isolator to minimize unwanted shifting movements.
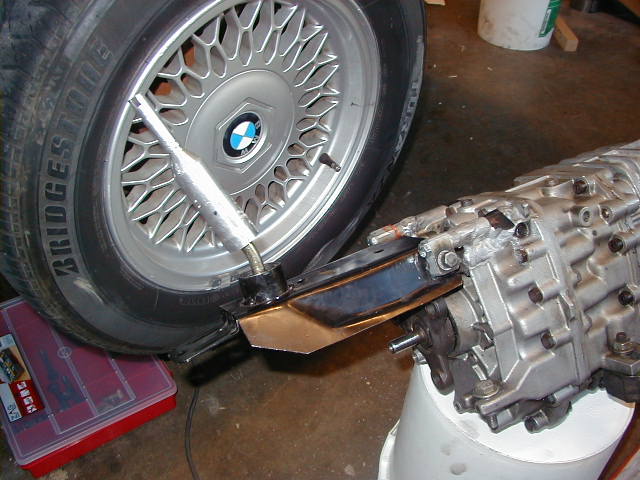
Reinstall the black metal deck. The horizontal bolts are fun to
get started since they are crowded by the side walls of the hump.
If you like, replace the rear rubber nipple with new from BMW, or
….
We recommend removing the factory brackets for the rear rubber
nipple assembly and replacing it with the more positive rubber
isolator. To do that swing the black metal piece up 1"
beneath the transmission hump. "Guesstimate" how far
rear of the sheet metal shift cut out that a hole should be
drilled. Drill hole down from inside the car. Bolt the isolator
into place. Sourcing the isolator is up to you. They are common
for electric motor mounts, small compressor mounts, etc. Some
sort of industrial supply must have them.
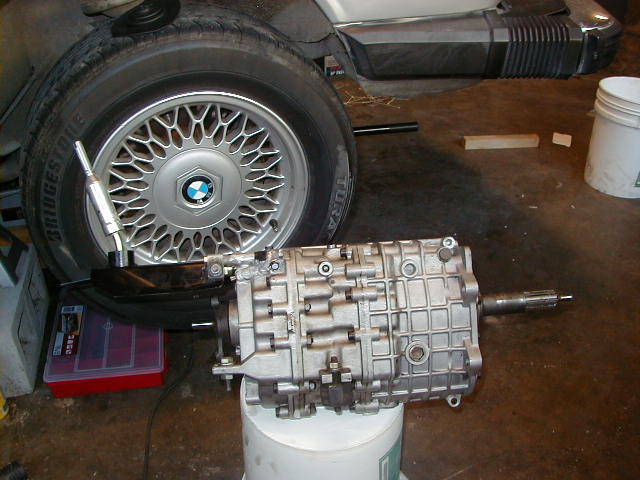
Replacing the transmission rubber mounts is pretty straight
forward. You will need to jack up the tranny while changing the
supports.
Auto Solutions shifter (top), OEM shifter (bottom), note difference in length below the balls. Note how beefy the A-S shifter is also note A-S bronze bushing.

Clockwise from top left: 2002 shifter, OEM shifter, black metal shift deck, black rubber isolator, BMP bushings and clip, cup connector w/ nylon bushing, keeper pin, spring metal circlip, 5 speed transfer linkage, BMP bronze bushings, large diameter retainer circlip not shown. Use far left hole on metal deck for rubber isolator.

BMP bronze bushing (half) 10mm, 3/8 x 1 bronze bushing prior to reaming and shortening, "c" clip

OEM connector cup (top), Auto Solutions (bottom), note indentations for spring circlip
Cup connector and circlip attached to tranny.
Note: Author bought a used tranny with broken mounting casting.
Had it welded. Other casting broke after a year of stress. Had it
welded. Drilled holes deep into tranny casing and tapped them for
40mm M6 bolts. No problems since.
Shows aluminum & rubber isolator connectors bolted to tranny castings and horizontally into the black metal shift deck.
Back to Frequently asked questions
© 2002, FirstFives.org™